Hey there! As a supplier of Flat Bed CNC Lathes, I often get asked how to set up the workpiece on these machines. It might seem a bit daunting at first, but once you get the hang of it, it’s a pretty straightforward process. In this blog, I’ll walk you through the steps to set up a workpiece on a Flat Bed CNC Lathe, sharing some tips and tricks along the way. Flat Bed CNC Lathe

Step 1: Choose the Right Workholding Device
The first thing you need to do is pick the right workholding device for your workpiece. There are several options out there, and the choice depends on the shape, size, and material of your workpiece.
- Chucks: These are the most common workholding devices. You’ve got three – jaw chucks, which are great for round workpieces. They’re self – centering, so they can quickly and easily grip the workpiece in the middle. Then there are four – jaw chucks. These are more versatile because you can adjust each jaw independently. That means you can hold irregularly shaped workpieces, like squares or hexagons.
- Collets: Collets are another option, especially for holding small, cylindrical workpieces. They provide a very precise and secure grip. They’re usually used when you need high accuracy, like in precision machining jobs.
- Faceplates: If you have a large or irregularly shaped workpiece that can’t be held by a chuck or collet, a faceplate is your go – to. You can bolt or clamp the workpiece directly to the faceplate, and it gives you a lot of flexibility in terms of positioning.
Step 2: Prepare the Workpiece
Once you’ve chosen the workholding device, it’s time to prep the workpiece.
- Clean the Workpiece: Make sure the workpiece is clean. Any dirt, oil, or debris can affect the grip of the workholding device and lead to inaccurate machining. You can use a clean cloth and some solvent to wipe it down.
- Check for Burrs: Look for any burrs or sharp edges on the workpiece. These can not only damage the workholding device but also pose a safety risk. You can use a file or deburring tool to remove them.
- Measure the Workpiece: Take accurate measurements of the workpiece. This is important for setting the correct machining parameters later on. You can use calipers or micrometers for this.
Step 3: Mount the Workholding Device
Now it’s time to attach the workholding device to the lathe spindle.
- Align the Workholding Device: Make sure the workholding device is properly aligned with the lathe spindle. You can use a dial indicator to check the alignment. A misaligned workholding device can cause the workpiece to rotate off – center, leading to poor machining results.
- Tighten the Mounting Bolts: Once it’s aligned, tighten the mounting bolts securely. But don’t over – tighten them, as this can distort the workholding device and affect its performance.
Step 4: Load the Workpiece into the Workholding Device
This step requires a bit of care.
- For Chucks: If you’re using a chuck, open the jaws wide enough to insert the workpiece. Then, gradually close the jaws until they grip the workpiece firmly. Make sure the workpiece is centered as best as you can. You can use a center finder or your eye (if it’s a rough estimate) to do this.
- For Collets: With collets, you’ll need to insert the workpiece into the collet and then tighten the collet nut. This will cause the collet to contract and grip the workpiece.
- For Faceplates: When using a faceplate, carefully position the workpiece on the faceplate. You might need to use shims to level it if necessary. Then, use bolts or clamps to secure it in place.
Step 5: Check the Workpiece Alignment
After loading the workpiece, it’s crucial to check its alignment.
- Radial Alignment: Use a dial indicator to check the radial alignment of the workpiece. Mount the dial indicator on the lathe tool post and touch the probe to the outer surface of the workpiece. Rotate the spindle slowly and observe the indicator reading. If the reading varies too much, you need to adjust the workpiece’s position in the workholding device.
- Axial Alignment: You also need to check the axial alignment, especially if you’re going to be machining the end face of the workpiece. Use the dial indicator to check the end face of the workpiece while rotating the spindle. Any variation in the reading indicates a problem with the axial alignment.
Step 6: Set the Zero Point
The zero point is the reference point for all the machining operations.
- X and Z Axes: Most Flat Bed CNC Lathes have a built – in tool setter or a way to manually set the zero point. You’ll need to set the zero point for both the X and Z axes. The X – axis usually corresponds to the cross – feed movement, and the Z – axis corresponds to the longitudinal movement.
- Tool Offset: Once you’ve set the zero point, you’ll also need to set the tool offset. This compensates for the difference in the position of the cutting tool and the zero point.
Step 7: Verify the Setup
Before you start machining, it’s a good idea to double – check everything.
- Visual Inspection: Take a good look at the workpiece and the workholding device. Make sure everything is secure and properly aligned.
- Dry Run: If your CNC lathe has a dry run function, use it. This allows you to simulate the machining process without actually cutting the material. It helps you spot any potential problems, like collisions or improper tool paths.
Tips and Tricks
- Use Soft Jaws: If you’re working with delicate or easily damaged workpieces, consider using soft jaws on your chuck. Soft jaws can be machined to fit the shape of your workpiece exactly, providing a better grip without causing damage.
- Balance the Workpiece: An unbalanced workpiece can cause vibrations during machining, which can affect the surface finish and tool life. You can use a balancing tool to check and correct the balance of the workpiece.
- Lubricate the Workholding Device: Regularly lubricate the moving parts of the workholding device, like the chuck jaws or collet nut. This helps to ensure smooth operation and prolongs the life of the device.
Conclusion
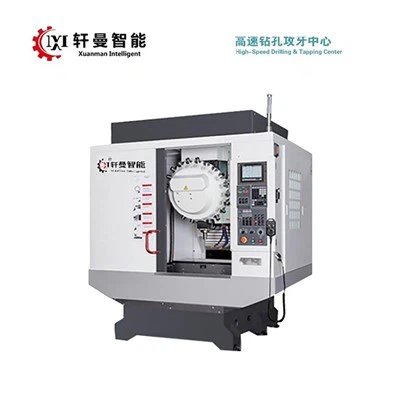
Setting up a workpiece on a Flat Bed CNC Lathe might seem complicated, but by following these steps and using the right techniques, you can do it like a pro. Remember, the key is to take your time, be precise, and always double – check your work.
CNC Gear Hobbing Machine If you’re in the market for a Flat Bed CNC Lathe or have any questions about workpiece setup or our products, don’t hesitate to reach out. We’re here to help you make the most of your machining operations and find the perfect solution for your needs.
References
- "CNC Machining Handbook" by an experienced machining engineer
- Industry – specific training materials on Flat Bed CNC Lathe operation
Jiangsu Xuanman Intelligent Equipment Co., Ltd.
We’re well-known as one of the leading flat bed CNC lathe manufacturers in China, featured by quality products and low price. Please rest assured to buy discount flat bed CNC lathe made in China here from our factory. We also accept customized orders.
Address: No. 1-1, Weier Road, Jieji Equipment Manufacturing Industrial Park, Sihong County, Suqian City, Jiangsu Province, China
E-mail: jsxmzn@163.com
WebSite: https://www.xm-cnc.com/
