Making DIY press – on nails is an exciting and creative process that allows individuals to express their personal style. As a press – on nails supplier, I’ve witnessed firsthand the growing popularity of this beauty trend. In this blog, I’ll walk you through the step – by – step process of making DIY press – on nails. Press On Nails
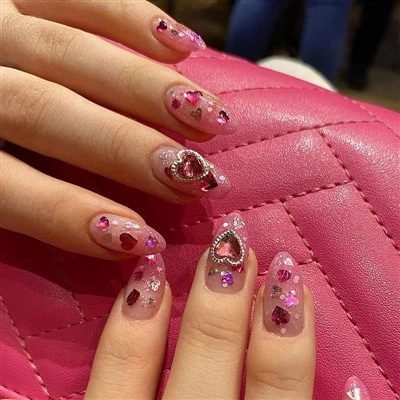
Step 1: Gather Your Materials
The first and most crucial step in making DIY press – on nails is to collect all the necessary materials. You will need nail forms in various sizes to fit different nail shapes and lengths. These forms act as the base on which you’ll build your press – on nails.
Acrylic powder and liquid are essential for creating the nail structure. The acrylic powder comes in different colors, allowing you to customize the look of your nails. You can choose from classic clear, white, or even vibrant shades to match your style.
A set of nail tools is also required. This includes a nail brush for applying the acrylic mixture, a nail file for shaping the nails, and a buffer for smoothing the surface. Additionally, you’ll need cuticle pushers to keep the nail area clean and free from debris.
For decoration, you can gather a collection of nail stickers, rhinestones, glitter, and nail art brushes. These items will help you add that extra sparkle and personality to your press – on nails.
Step 2: Prepare Your Natural Nails
Before you start creating the press – on nails, it’s important to prepare your natural nails. Begin by removing any existing nail polish using a nail polish remover. Make sure to choose an acetone – free remover to avoid drying out your nails.
Next, use a nail file to gently shape your natural nails. You can choose a shape such as square, oval, or almond, depending on your preference. After shaping, use a buffer to smooth the surface of your nails, removing any ridges or rough spots.
Push back your cuticles using a cuticle pusher. This will create a clean and even surface for the press – on nails to adhere to. Be careful not to cut your cuticles, as this can cause infection.
Step 3: Select the Right Nail Forms
Choosing the correct nail forms is vital for a comfortable and well – fitting press – on nail. Start by measuring the width of your natural nails at the base. Match this measurement with the appropriate size on the nail forms.
Place the nail form on your natural nail, making sure it fits snugly and extends slightly beyond the tip of your nail. If the form is too large, it may not adhere properly, and if it’s too small, it won’t cover your entire nail.
Step 4: Mix the Acrylic Powder and Liquid
Now it’s time to create the acrylic mixture. Pour a small amount of acrylic liquid into a clean dish. Dip your nail brush into the liquid and then into the acrylic powder. You want to create a ball of acrylic on the tip of your brush.
The consistency of the acrylic mixture is crucial. It should be thick enough to hold its shape but not too dry or crumbly. Practice mixing a small amount first to get the right consistency.
Step 5: Apply the Acrylic to the Nail Forms
Starting at the cuticle area of the nail form, begin applying the acrylic mixture. Use the nail brush to spread the acrylic evenly across the nail form, covering it completely. You can build up the thickness of the acrylic as needed, especially if you want a more durable press – on nail.
Work quickly, as the acrylic will start to dry fairly rapidly. Smooth out any bumps or uneven areas with the nail brush. Make sure the acrylic reaches the edges of the nail form to ensure a complete and seamless nail.
Step 6: Shape and File the Press – On Nails
Once the acrylic has dried, carefully remove the press – on nail from the nail form. Use a nail file to shape the nail to your desired length. You can file the sides to create a more tapered look or keep them straight for a square shape.
File the tip of the nail to smooth it out and remove any rough edges. Be careful not to file too aggressively, as this can weaken the nail. After filing, use a buffer to give the nail a smooth and shiny finish.
Step 7: Decorate Your Press – On Nails
This is where your creativity can really shine. You can use nail stickers to add patterns or designs to your nails. Simply peel the sticker off the backing and carefully place it on the nail. Press down firmly to ensure it adheres properly.
For a more glamorous look, you can add rhinestones or glitter. Use a small amount of nail glue to attach the rhinestones to the nail. You can also mix glitter with clear nail polish and paint it on the nails for an all – over sparkly effect.
Nail art brushes can be used to create free – hand designs. You can use different colors of nail polish to paint lines, dots, or other intricate patterns on the nails.
Step 8: Apply the Press – On Nails
Before applying the press – on nails, make sure your natural nails are clean and dry. You can use a small amount of rubbing alcohol to clean them one last time.
Apply a thin layer of nail glue to the back of the press – on nail. Place the nail on your natural nail, starting from the cuticle area and pressing down firmly. Hold the nail in place for a few seconds to allow the glue to set.
Repeat the process for each nail. Make sure the press – on nails are aligned properly and that there are no air bubbles trapped between the nails.
Step 9: Maintain Your DIY Press – On Nails
Once you’ve applied the press – on nails, it’s important to take care of them to ensure they last. Avoid using your nails as tools, such as opening cans or scratching surfaces, as this can cause the nails to break or lift.
Keep your nails dry and away from harsh chemicals. If you’re doing household chores, wear gloves to protect your nails. You can also apply a top coat of clear nail polish every few days to keep the nails shiny and add an extra layer of protection.
Why Choose Our Press – On Nails
As a press – on nails supplier, we understand the importance of quality and variety. Our nail forms are made from high – quality materials that are comfortable to wear and provide a perfect fit. We offer a wide range of acrylic powder colors, allowing you to create any look you desire.
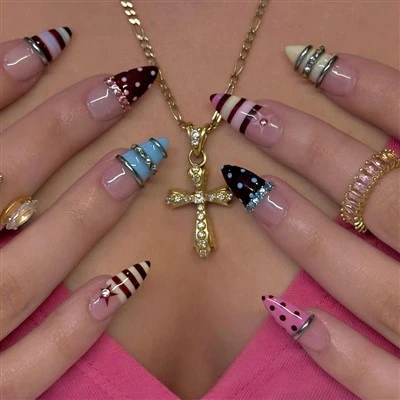
Our nail art supplies, such as stickers, rhinestones, and glitter, are of the highest quality and are easy to use. We also provide detailed instructions and tutorials to help you create the perfect DIY press – on nails.
Press On Nails If you’re interested in purchasing our press – on nails or any of our related products for your DIY projects, we’d love to discuss your needs. Whether you’re an individual looking for a fun project or a business interested in bulk orders, we’re here to assist you. Reach out to us to start a conversation about your requirements and how we can meet them.
References
- "Nail Art Handbook" by Smith, A.
- "The Complete Guide to Acrylic Nails" by Johnson, B.
- "DIY Beauty: Creating Your Own Press – On Nails" published by Cosmetics Publishing Group.
Yiwu Xinzhuo Nails Co., Ltd.
As one of the most professional press on nails manufacturers and suppliers in China, we offer a wide range of products with superior quality. We warmly welcome you to wholesale premium press on nails in stock here from our factory. Customized orders are welcome.
Address: No 301,Gaotang Road,SuxiTown,Yiwu City,Zhejiang Province,,China
E-mail: jenson@xinzhuonails.com
WebSite: https://www.xinzhuonails.com/
